How to Create a Brevo API Key
A Brevo API key is a secret string of letters and numbers that lets another tool read your Brevo email marketing data on your behalf — safely, and only for what you allow. You don't need to be a developer to make one. This guide walks you through it with a screenshot for every single click, start to finish, in about two minutes.
Most people end up here because a tool asked them for a Brevo API key and they had no idea what that meant or where to find it. That's completely normal — Brevo tucks API keys away in the settings, where everyday email marketers rarely look. The good news: creating one is just a few clicks once you know the path.
Why you might need this: the free ManyMeet Brevo dashboard uses a Brevo API key to pull your campaign stats and show you which recipient domains actually open your emails, aggregated across every send. The key you create below is exactly what that Brevo dashboard needs to get started. Your key stays in your browser session only — it is never stored or logged.
Before you start
- You'll need to be logged in to your Brevo account in another tab.
- Anyone with access to your Brevo account settings can do this — no technical knowledge required.
- Treat an API key like a password: don't share it publicly, and delete it when you no longer need it (the last step shows you how).
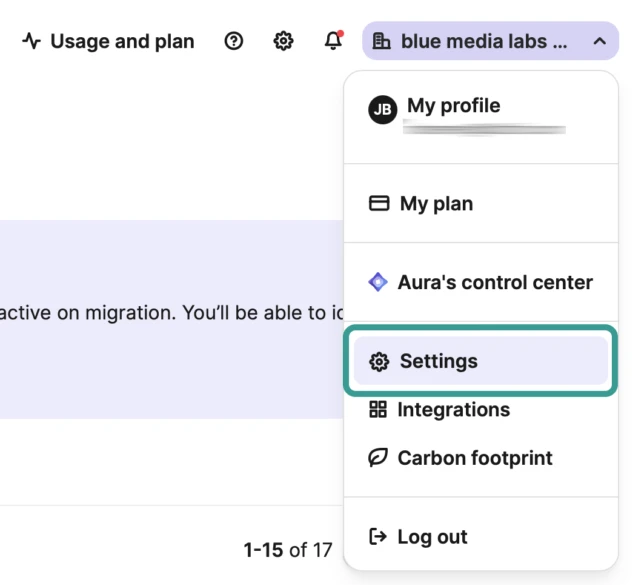
Step 1 — Open your account menu and go to Settings
In Brevo, click your company name in the top-right corner to open the account menu, then choose Settings. This is where Brevo keeps everything that isn't a campaign — including your API keys.
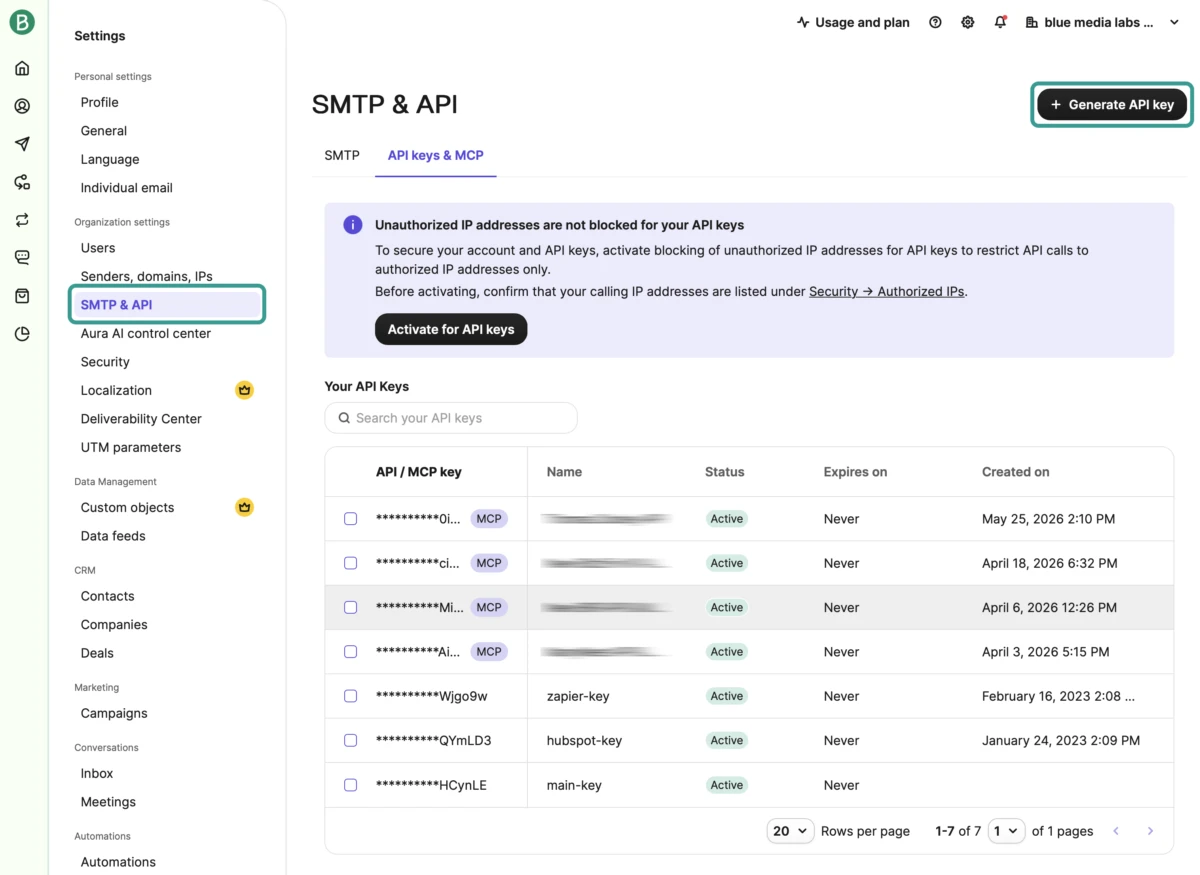
Step 2 — Open “SMTP & API” and the “Generate API key” button
In the left-hand Settings menu, under Personal settings, click SMTP & API, then open the API keys & MCP tab. This page lists any Brevo API keys you already have. To make a new one, click the + Generate API key button in the top-right corner.
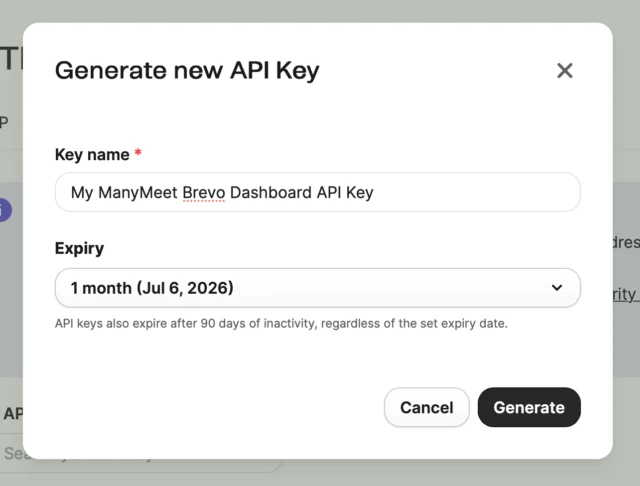
Step 3 — Name your new Brevo API key
Give the key a name you'll recognise later, such as My ManyMeet Brevo Dashboard API Key. The name is just a label for you — it has no effect on what the key can do, but a clear name makes it easy to find and delete the right one afterwards.

Step 4 — Choose an expiry and click Generate
Pick an expiry from the dropdown. For a one-off task you can choose a short window like 1 month — the key stops working automatically after that, which is the safest option. (Brevo also expires keys after 90 days of inactivity regardless of this setting.) When you're happy, click Generate.
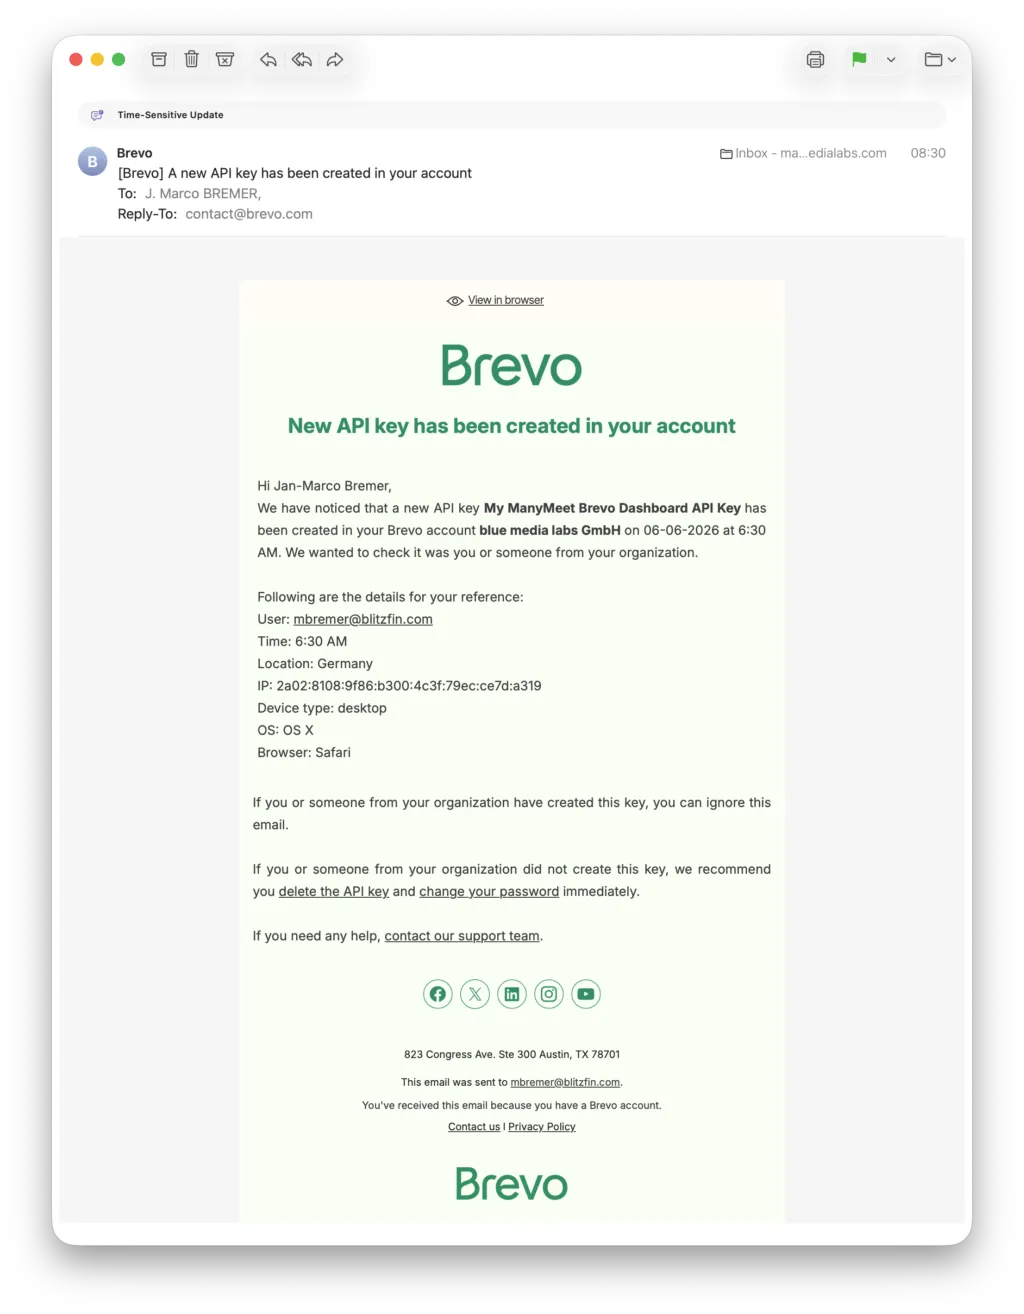
Step 5 — Expect a confirmation email from Brevo
For your security, Brevo emails you whenever a new API key is created, noting the time, location, and device. This is normal — if it was you, you can ignore it. If you ever get one of these and it wasn't you, that's your cue to delete the key and change your password.
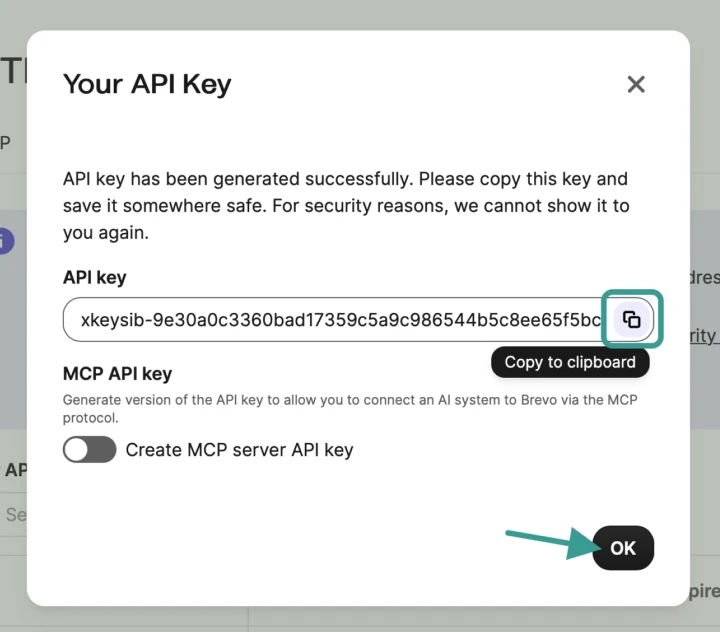
Step 6 — Copy your Brevo API key
Brevo now shows your brand-new API key once — and only once. Click the copy icon next to it to put it on your clipboard, then click OK. You can leave the “Create MCP server API key” toggle off; it isn't needed for the Brevo dashboard.
Important: for security reasons, Brevo cannot show you this key again after you close the dialog. Paste it straight into the tool you're using — for example the ManyMeet Brevo dashboard — or into a secure note. If you lose it, no harm done: just delete the key and generate a fresh one.
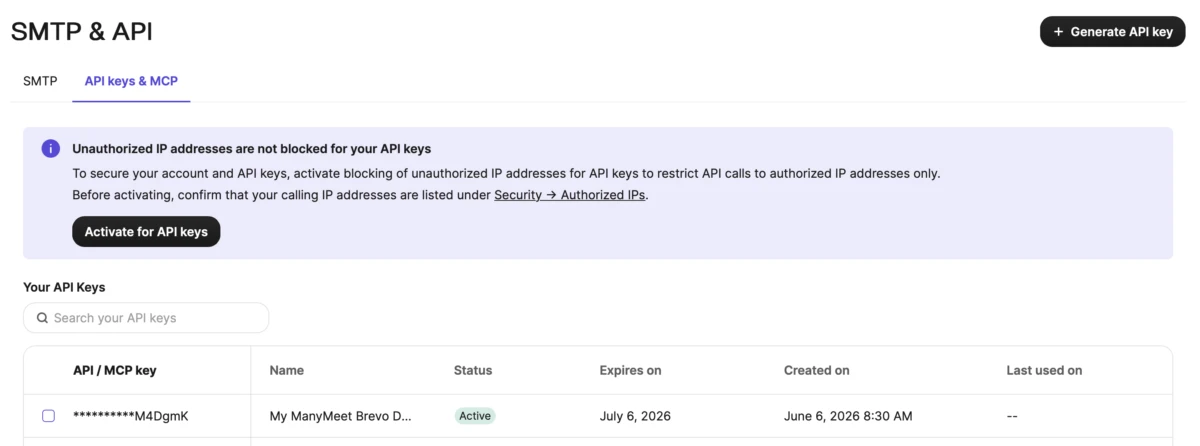
Step 7 — Your new key is now in the list
Back on the API keys & MCP page, your new Brevo API key appears in the table — by name, with its status, expiry date, and when it was created. That's your confirmation everything worked. You can now paste the key into the ManyMeet Brevo dashboard and watch your opens-by-domain report build itself.
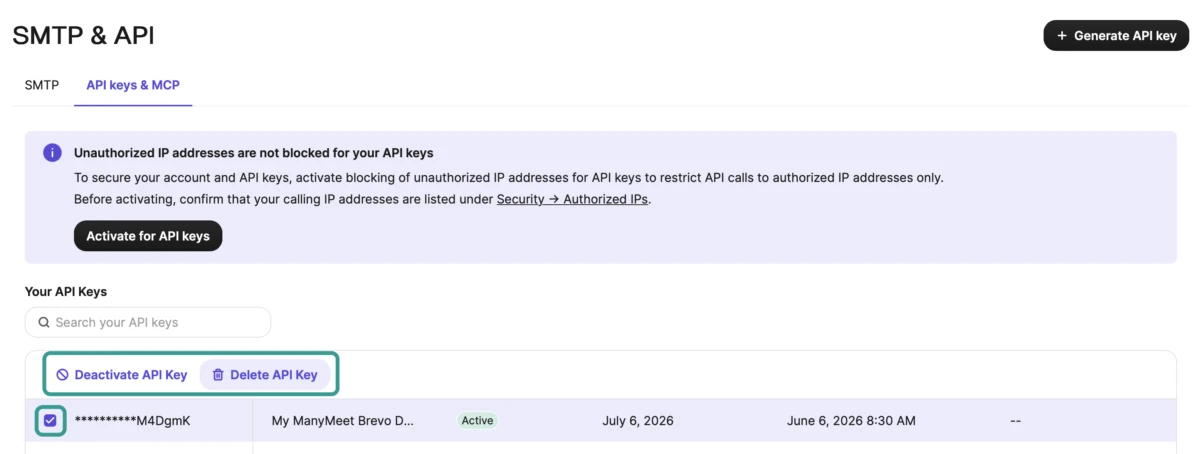
Step 8 — Deleting a Brevo API key when you're done
When you no longer need a key, remove it. On the API keys & MCP page, tick the checkbox next to the key — a small toolbar appears — then click Delete API Key (or Deactivate API Key if you'd rather keep it around but switched off). The moment a key is deleted, any tool using it loses access, so this is the clean way to revoke that access entirely.
That's it — you have a Brevo API key
You've created, copied, verified, and (when ready) removed a Brevo API key — no developer required. With it you can connect your Brevo email marketing account to all sorts of tools, including the free ManyMeet Brevo dashboard.
A few good habits
- One key per tool. Give each tool its own named key so you can revoke just that one later without breaking anything else.
- Prefer short expiries. For one-off analysis, a 1-month key (or shorter) limits how long a leaked key could ever be misused.
- Delete when done. If you only wanted a quick look at your numbers, delete the key afterwards (Step 8). You can always make a new one in two minutes.
Next step: see which domains open your emails
Now that you have your key, put it to work. The free ManyMeet Brevo dashboard aggregates opens-by-domain across every campaign in your account — ranked, filterable, and exportable as CSV — so you can finally see where your audience actually lives.
Open the free ManyMeet Brevo dashboard →
Want the background story? Read how a question in the Brevo community forum turned into a free dashboard.