Visual Walkthrough: Connect AI Assistants to ManyMeet
This page shows the step-by-step setup for each AI assistant. For general instructions, connection URL, and troubleshooting, see the main connection guide.
All assistants connect to the same MCP server:
https://app.getmanymeet.com/mcp/ManyMeet supports OAuth 2.0 with dynamic discovery — most apps detect the authentication method automatically. You log in with your regular ManyMeet email, no passwords or API keys needed.
No ManyMeet account yet? If you run webinars on Zoom Meetings, create a free account and observe your next webinar — then come back here to see your live data in any AI assistant.
Jump to: Claude Desktop · ChatGPT · Gemini · Microsoft Copilot · GitHub Copilot
Claude Desktop
Works with Claude Desktop (Chat & Cowork modes). Requires a Claude Pro, Team, or Enterprise plan.
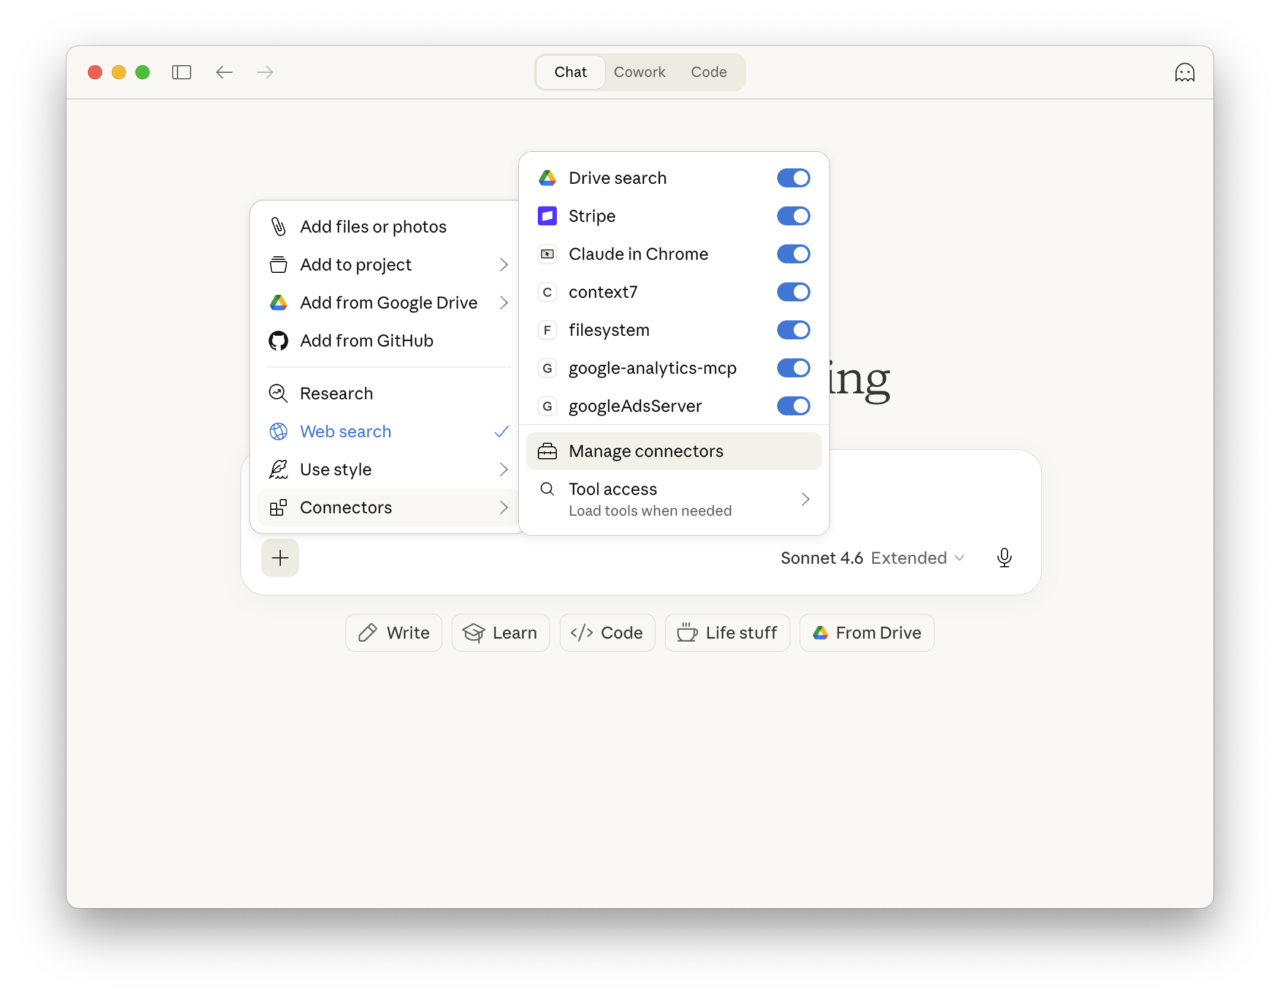
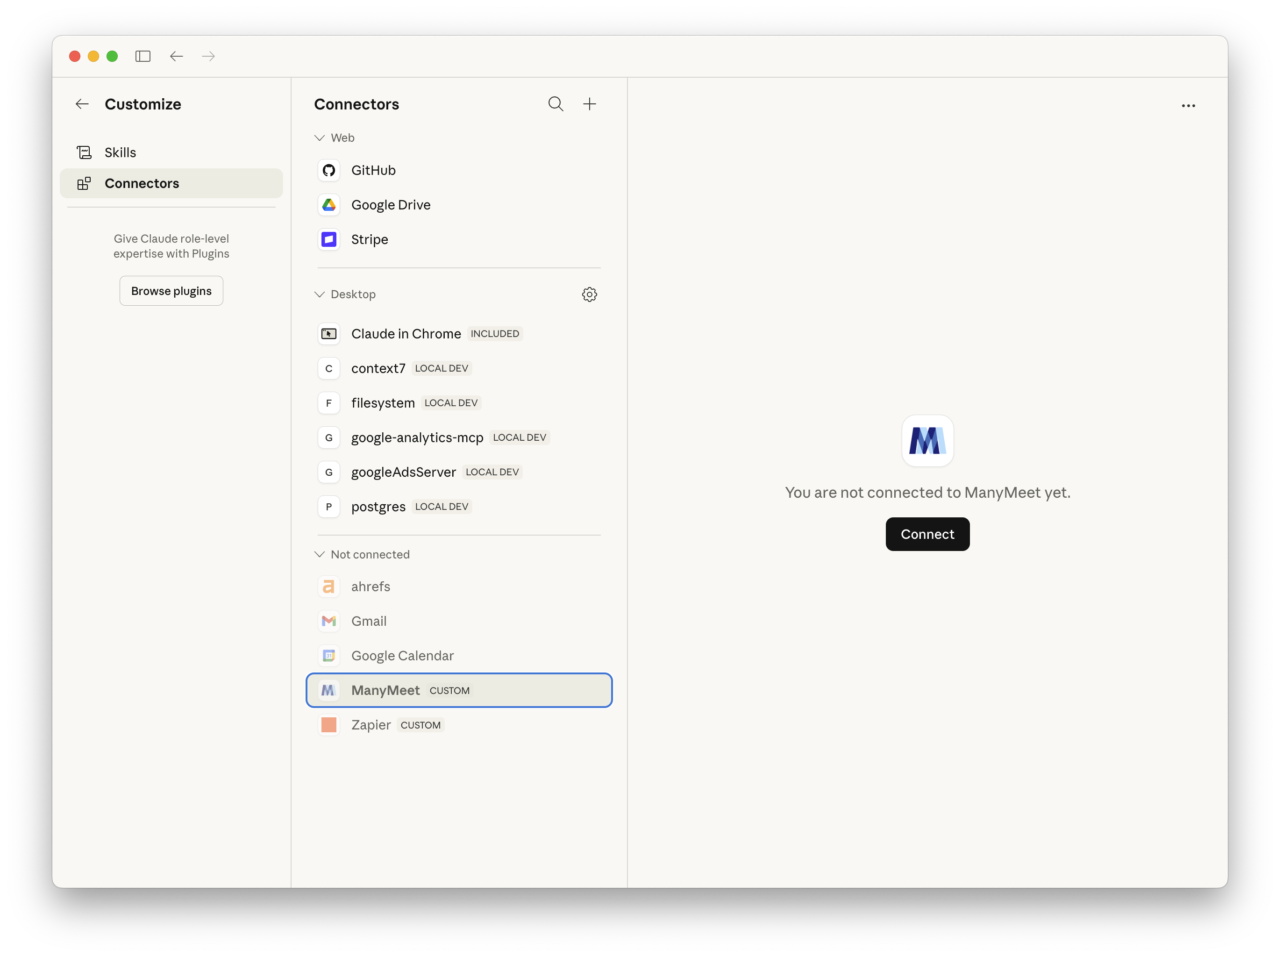
Step 1 — Open the connectors menu
Click the + button in the message composer, then go to Connectors > Manage connectors.
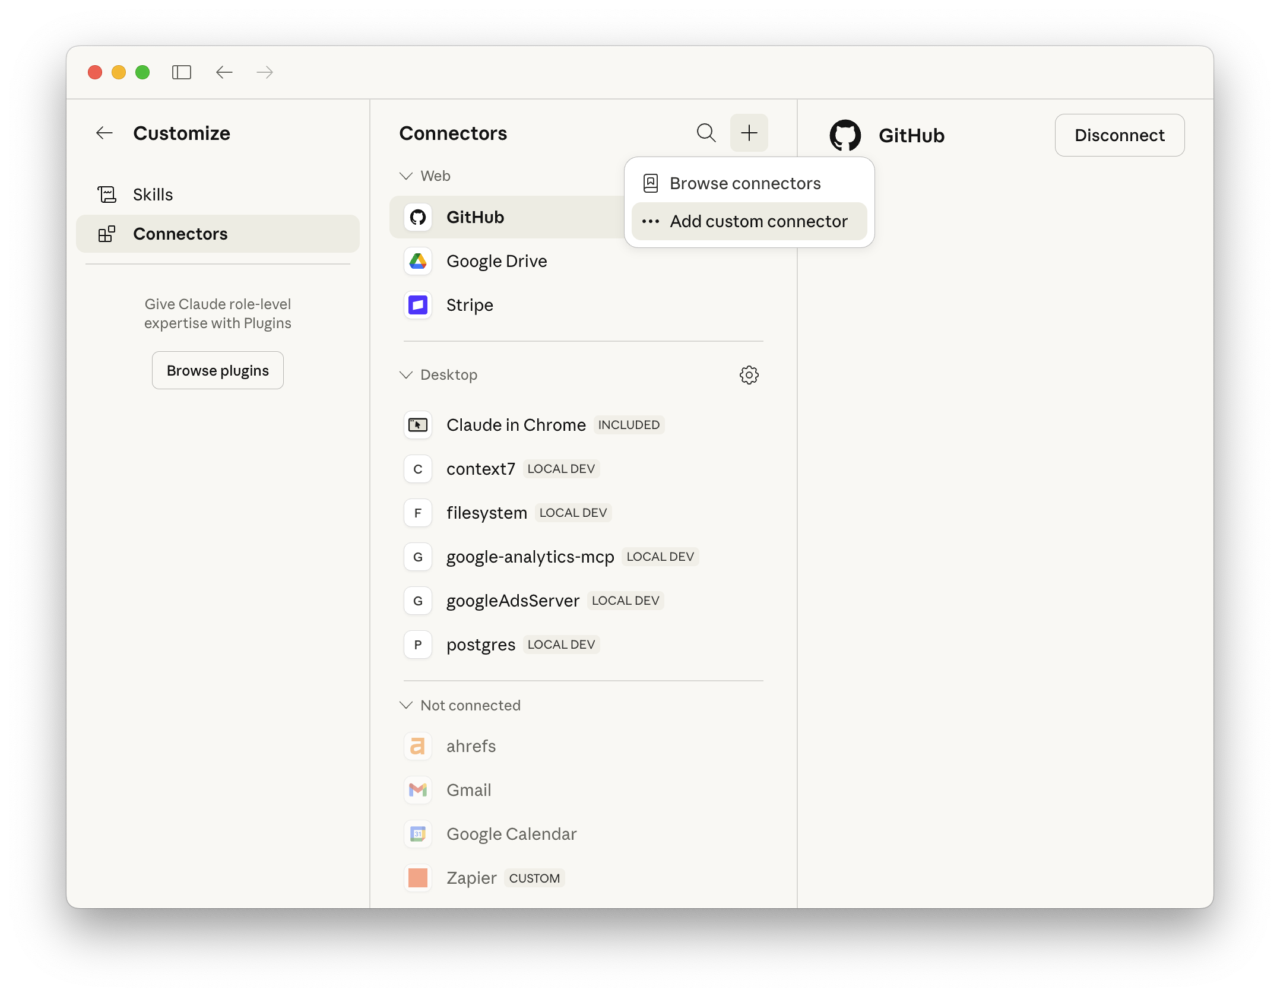
Step 2 — Add a custom connector
Click the + button at the top of the Connectors panel, then choose Add custom connector.
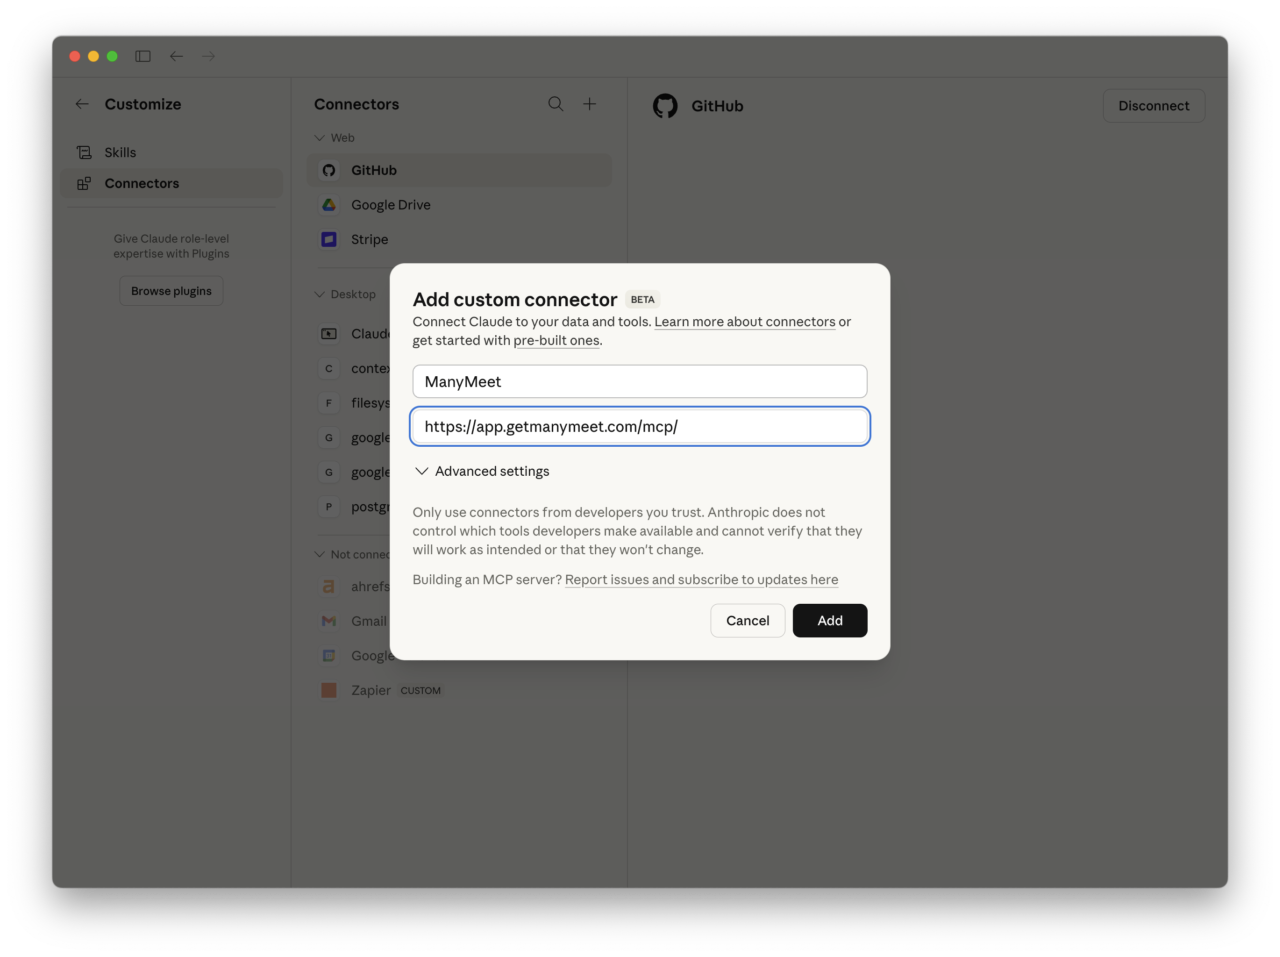
Step 3 — Enter the ManyMeet details
Enter ManyMeet as the name and https://app.getmanymeet.com/mcp/ as the URL. Click Add.
Step 4 — Connect
ManyMeet appears under Not connected. Click Connect. Your browser opens with the ManyMeet login page — enter your email and click the login link that arrives in your inbox.
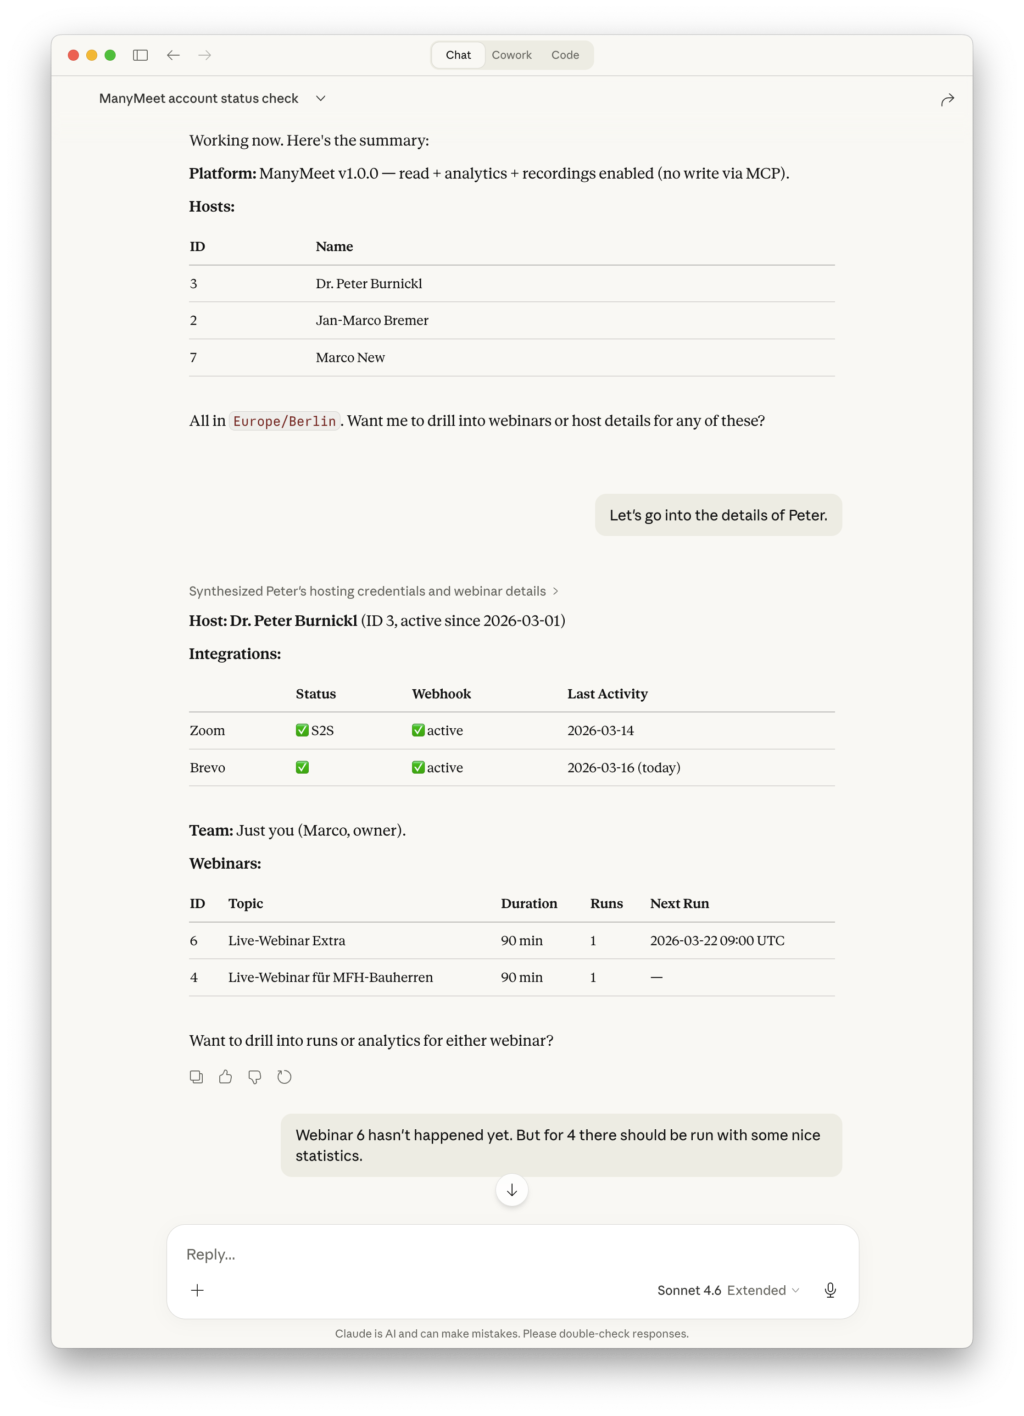
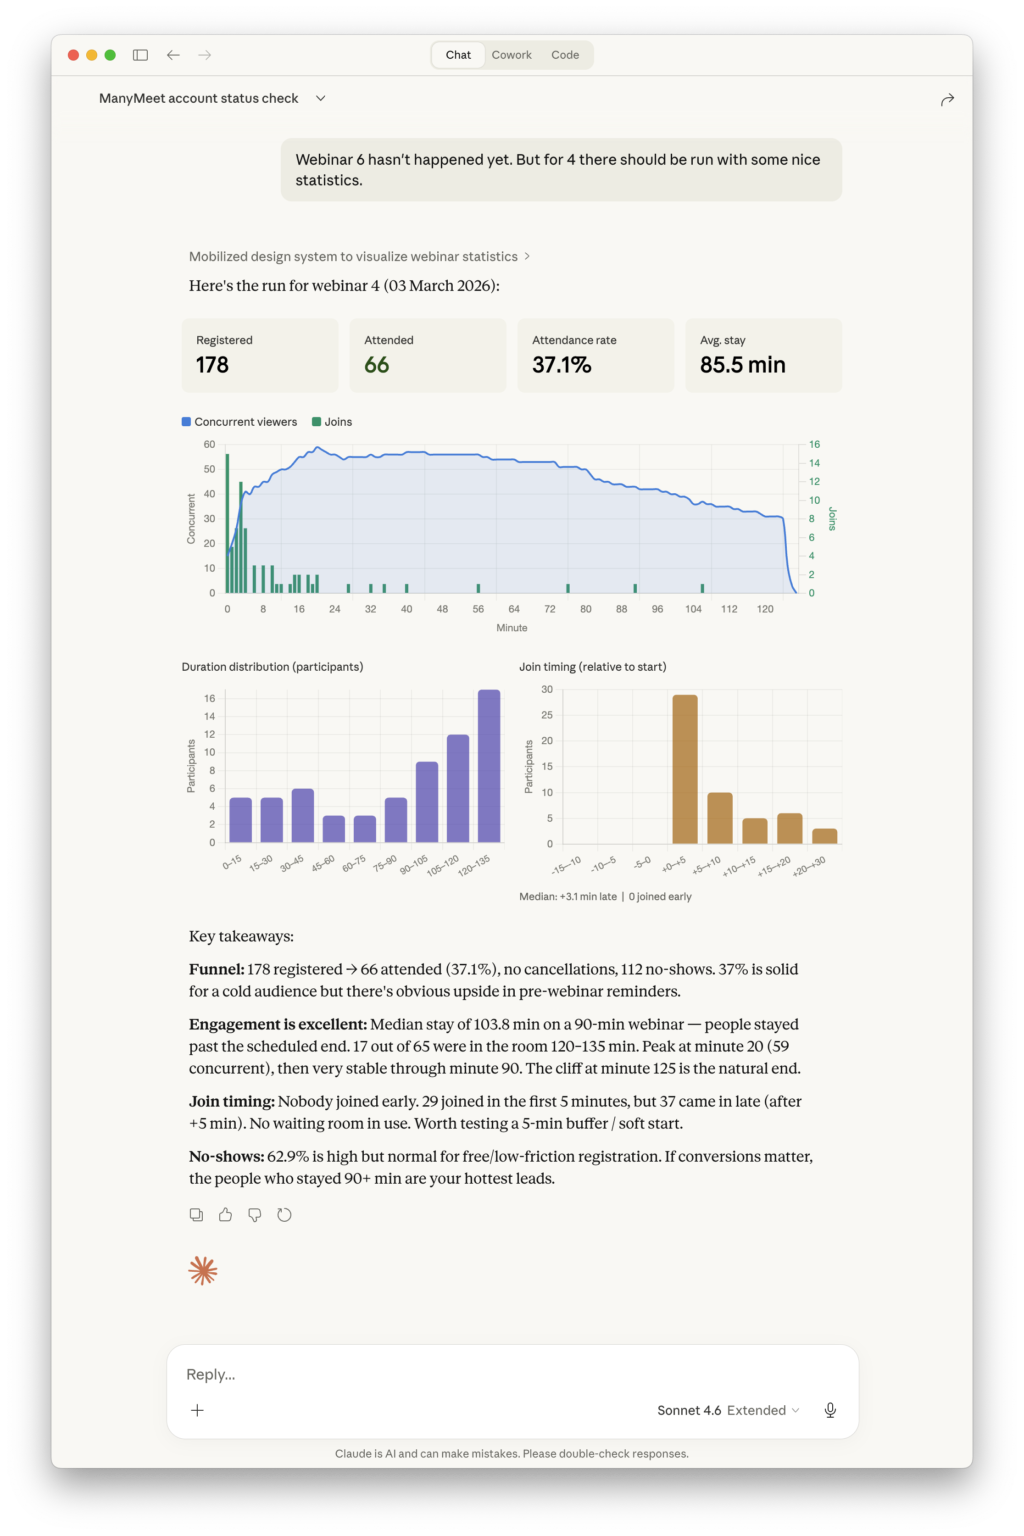
In action
Once connected, Claude can browse your hosts, webinars, and runs — and generate charts from your analytics data:
Official guide: Anthropic — Connect to remote MCP integrations
ChatGPT
Works with ChatGPT on web and desktop. Requires a Plus, Pro, Team, Enterprise, or Education plan.
Step 1 — Enable Developer Mode
Go to Settings > Apps & Connectors > Advanced settings and toggle on Developer mode.
Step 2 — Create an app
Click Create app next to Advanced settings. Enter:
- Connector name: ManyMeet
- Connector URL:
https://app.getmanymeet.com/mcp/
Check the trust checkbox and click Add. ChatGPT will auto-discover the OAuth settings and prompt you to log in via your browser.
Step 3 — Use in a conversation
In a new chat, click the + button near the message composer, select More, and enable the ManyMeet connector. Then ask your question.
Official guide: OpenAI — Developer mode and MCP apps in ChatGPT
Gemini
Gemini CLI supports remote MCP servers with automatic OAuth discovery. Gemini web/app support for custom MCP servers is still rolling out.
Gemini CLI
Edit your Gemini settings file (~/.gemini/settings.json) and add:
{
  "mcpServers": {
    "manymeet": {
      "uri": "https://app.getmanymeet.com/mcp/"
    }
  }
}
When you run a query that uses ManyMeet, Gemini CLI detects the OAuth requirement automatically, opens your browser for login, and handles token management from there.
Official guide: Google — MCP servers with the Gemini CLI
Microsoft Copilot Studio
Microsoft Copilot Studio is Microsoft's platform for building AI agents and automations. It supports connecting to remote MCP servers with OAuth. This is different from the consumer Windows Copilot or Copilot in Edge, which do not support custom MCP servers.
Step 1 — Add a new tool
In Copilot Studio, go to Tools > Add Tool > New Tool > MCP.
Step 2 — Configure the server
Enter the connection details:
- Server name: ManyMeet
- Server description: Webinar intelligence — registrations, attendance, analytics, recordings
- Server URL:
https://app.getmanymeet.com/mcp/
For authentication, select OAuth 2.0. Copilot Studio will discover the OAuth endpoints automatically from the server URL.
Step 3 — Authenticate
Complete the OAuth flow — your browser opens with the ManyMeet login page. After logging in, the MCP tools become available to your Copilot Studio agent.
Official guide: Microsoft — Connect your agent to an MCP server
GitHub Copilot (VS Code)
Works with GitHub Copilot Chat in VS Code 1.101 or later. Also supported in JetBrains, Eclipse, and Xcode.
Option A — MCP configuration file
Add to your .vscode/mcp.json (project-level) or user settings:
{
  "servers": {
    "manymeet": {
      "type": "http",
      "url": "https://app.getmanymeet.com/mcp/",
      "authentication": {
        "type": "oauth",
        "oauth_type": "dynamic_discovery"
      }
    }
  }
}
When VS Code loads the config, it shows an Auth CodeLens above the server entry. Click it to open the OAuth flow in your browser.
Option B — Command Palette
- Open the Command Palette (
Cmd+Shift+P/Ctrl+Shift+P) - Run MCP: Add Server
- Choose HTTP as transport type
- Enter the URL:
https://app.getmanymeet.com/mcp/ - Select OAuth 2.0 as authentication, then Dynamic discovery
Once connected, use ManyMeet tools in Copilot Chat by asking questions about your webinar data.
Official guide: VS Code — Add and manage MCP servers
Next steps
- Main connection guide — what data is available, troubleshooting, and disconnecting
- Connect with an API Key — for automations and CI/CD